
Teaching anatomy and physiology with VOKA: educator’s manual
Share:
Copy link
Share via Telegram
Share on Facebook
Share on LinkedIn
Share via WhatsApp
Share on X
Share via Email
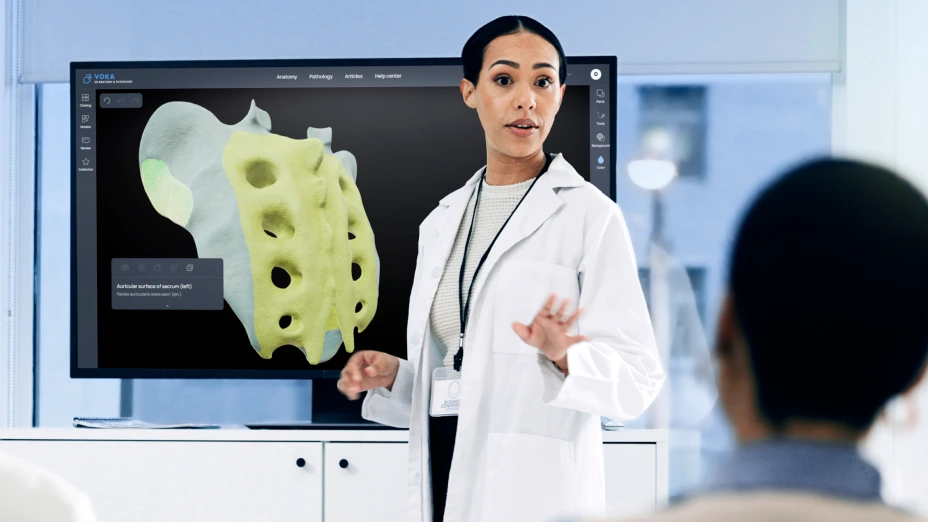
Table of contents
While learning anatomy and pathology is tough, teaching them can be even trickier. The human body comprises numerous parts that work together in ways that are often difficult to see or fully comprehend. As a teacher, you can't just point at a picture and expect students to grasp all spatial relations. You need to find ways to effectively demonstrate complex structures so that students grasp and retain what they learn. And that’s hard without the right tools. In this article, we’ll share practical tips for using VOKA 3D Anatomy & Pathology to make your teaching more visually engaging.
Why are interactive tools effective in teaching anatomy and physiology?
Interactive tools are effective for teaching anatomy and physiology curriculum because they help students visualize complex structures, engage more deeply with the material, and retain information longer. By combining spatial learning with active exploration, these tools turn abstract concepts into concrete understanding.
Before we dive into how VOKA fits into your curriculum, let’s take a closer look at why this approach works so well and how it supports better learning outcomes in both academic and clinical training environments.
-
Simplified explanation of complex concepts. Instead of verbal explanations and 2D images, educators can visualize organs and systems through interactive anatomy teaching models, offering a deeper view of how the body works. Seeing things in 3D makes learning more real and helps students retain information for longer.
-
Increased student engagement. By using interactive apps, teachers can make lessons more dynamic and encourage hands-on anatomy learning. When students explore models independently, they grasp difficult concepts more easily and stay focused during lessons.
-
Personalized learning opportunities. 3D anatomy education tools let students learn at their own pace, which is especially helpful in a classroom with varying levels of understanding. Teachers can assign specific tasks for students to focus on, and they can revise complex topics as needed without slowing down the entire class.
Integrating VOKA into various teaching approaches
Adding 3D medical visualizations to your curriculum can drastically boost student engagement in anatomy. Whether you teach through lectures, problem-based learning, or lab sessions, VOKA complements a wide range of teaching styles by turning static content into dynamic, immersive experiences. Here are the key approaches you can use VOKA for:
1. Guided discovery: Let students find the answers, with a little help
Guided discovery encourages students to explore content independently, but with thoughtful prompts to help them stay focused and think critically. Rather than simply providing answers, educators pose questions that push students to make connections between structure and function.
Example prompt:
“During surgery, the tip of the scalpel accidentally touches the primary motor cortex. What might happen to the patient’s ability to move, and which side of the body would be affected?”
This kind of inquiry encourages active thinking, not just passive memorization.
How VOKA enhances guided discovery
VOKA gives educators the tools to lead students through structured exploration in a way that’s hands-on, customizable, and visually rich. Key features include:
-
Zoom, rotate, and isolate structures to guide focus
-
Draw and annotate directly on 3D models for clarity and emphasis
-
Toggle systems on and off (e.g., muscular, nervous, circulatory) to explore relationships between structures
-
Customize views and settings to tailor lessons for different learning levels
-
Perform virtual dissections to reveal internal anatomy layer by layer
These interactive capabilities give educators more flexibility and students more control over how they engage with the material.
Augmented reality (AR): Bringing anatomy into the room
Want to take guided discovery to the next level? VOKA’s AR mode lets students project 3D anatomical models into their real-world environment using a phone or tablet.
This creates a highly immersive experience where students can:
-
Walk around the model
-
View it from different angles
-
Interact with structures as if the body were physically present in the room
By making anatomy feel less abstract and more tangible, AR adds a memorable dimension to learning that traditional tools just can’t match.
2. Layered teaching: Building understanding step by step

The idea behind the layered teaching of anatomy and physiology is to introduce concepts in stages, starting with the basics and working up. Begin with the simplest body systems, such as the musculoskeletal or circulatory system, and then gradually add more complexity as students get comfortable.
Start with the basics, then build
For example, when teaching the anatomy of the arm, you might:
1
Begin with the skeletal structure to identify the humerus, radius, and ulna
2
Add the muscular layer to show how muscles attach and move the bones
3
Introduce nerves and blood vessels to explain how they support function and responsiveness
This progressive exposure helps students understand both what each part is and how the systems work together.
How VOKA supports layered teaching
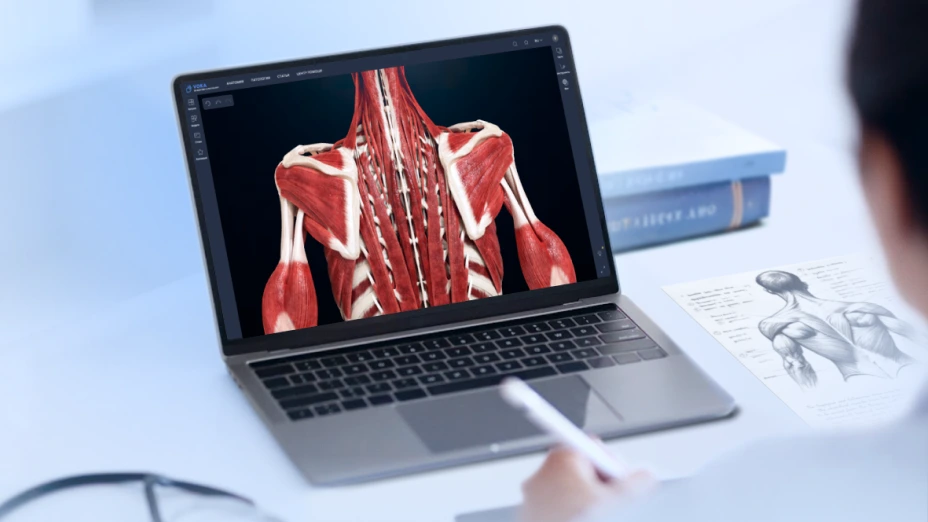
VOKA’s interactive 3D atlas makes this process seamless. Educators can:
-
Hide or reveal anatomical layers to match the stage of the lesson
-
Focus on one system at a time, then show how others integrate
-
Zoom in on key relationships between structures, such as a nerve passing through a muscle or a vessel wrapping around a bone
-
Control complexity in real time, adjusting to the needs of each group or individual learner
This kind of hands-on layering helps students organize information more effectively and develop a deeper, systems-level understanding of the body.
Bonus benefit: Layered teaching also reduces cognitive overload, one of the most common barriers in first-year anatomy courses.
3. Flipped classroom approach: Turning passive learning into active understanding
The flipped classroom model shifts the focus from passive in-class lectures to active, student-led learning. Students explore core material before class, freeing up classroom time for deeper discussion, clarification, and critical thinking.
How VOKA enhances the flipped learning model
With VOKA, students can take control of their learning outside the classroom. They can:
-
Explore anatomical structures independently at their own pace
-
Leave annotations to capture thoughts or questions as they go
-
Review tricky areas as many times as needed before class
This helps students arrive prepared, rather than with surface-level knowledge; they come with specific questions and a clearer sense of what they need help with.
Maximizing class time
Once in the classroom, you can skip the basics and focus on:
-
Clarifying misconceptions using VOKA’s visual tools
-
Encouraging peer discussion based on shared explorations
-
Applying concepts to clinical scenarios, case studies, or problem-solving exercises
-
Providing targeted support for students who struggled with specific content
Why it works: When students come to class already familiar with the material, you can meet them where they are and take them further, faster.
4. Problem-based learning: Bridging theory with clinical practice
Problem-based learning (PBL) places students in realistic clinical scenarios that require critical thinking, diagnosis, and collaboration. It mirrors real-life medical challenges and helps students connect anatomy knowledge with hands-on decision-making.
How VOKA supports PBL
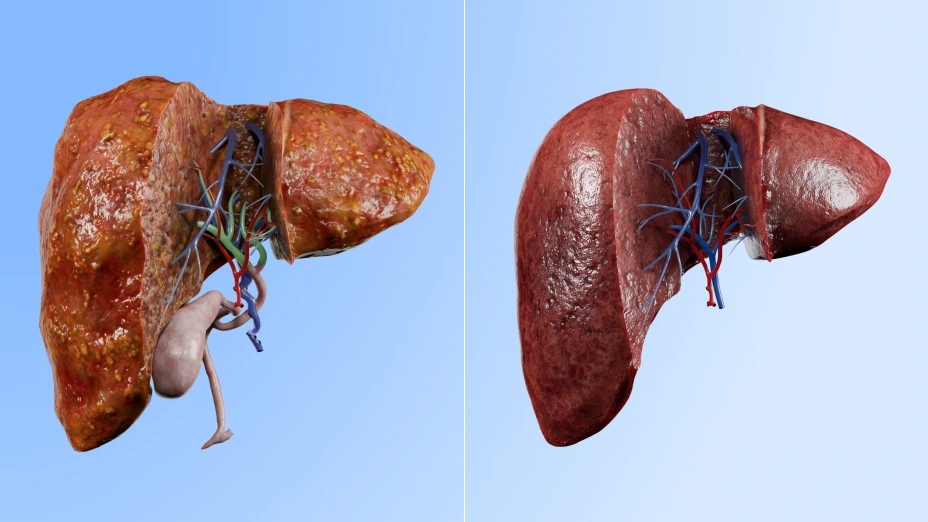
VOKA 3D Anatomy & Pathology enhances the PBL approach by allowing students to:
-
Compare healthy vs. diseased anatomy side-by-side
-
Explore pathophysiological changes in specific systems or organs
-
Visually connect symptoms with anatomical transformations
For example, show a healthy lung next to one with advanced emphysema, then challenge students to interpret a patient’s symptoms in light of what they see.
Applying knowledge through interactive cases
Once students understand the visual differences between normal and pathological structures, educators can introduce case-based tasks. With VOKA, students can:
-
Interact with 3D models to examine affected systems
-
Use visual cues to link symptoms to anatomical disruptions
-
Build diagnostic hypotheses and justify them with evidence from the models
This process transforms passive learning into active, investigative problem-solving.
Promoting teamwork and collaboration
PBL thrives on collaboration. VOKA makes it easy for students to:
-
Work in small groups
-
Share observations and compare interpretations
-
Debate potential diagnoses and treatment paths
Bonus: VOKA’s annotation and collection tools let students document their findings, making it easier to present and defend their reasoning.
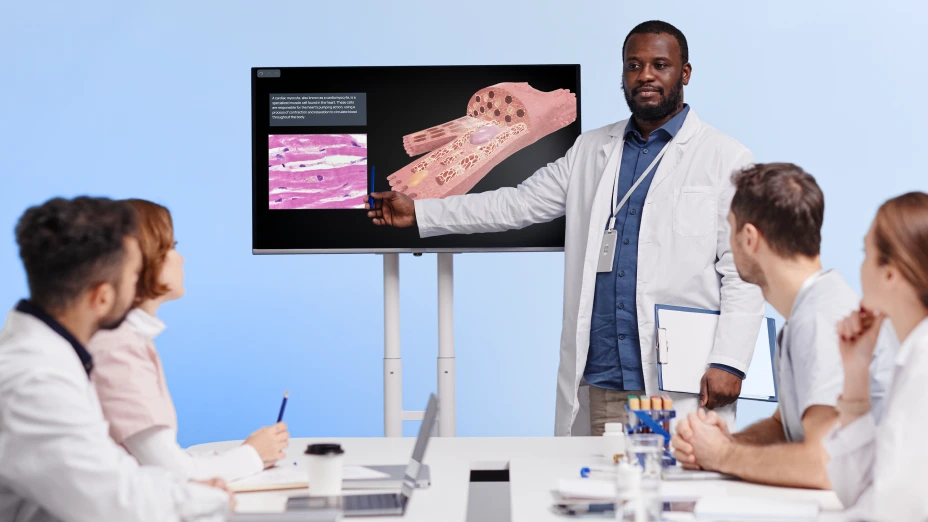
5. Peer teaching: The fun way to teach anatomy
Peer teaching turns students into active participants in the learning process. VOKA makes it even more effective by giving them the tools to explore and present anatomy in a hands-on, visual way.
How it works
1
Divide the class into small groups
Assign each group a body system or anatomical region (e.g., digestive system, major muscle groups, circulatory pathways).
2
Explore using VOKA 3D Anatomy & Pathology
Groups use VOKA’s interactive models to investigate their assigned topic.
They can rotate, zoom, annotate, and add models to a personal collection to organize what they find.3
Present findings to the class
Students explain their system to peers using visuals from VOKA.
They teach not just what it is, but how it works, reinforcing their understanding.
Why it works
-
Active learning: Teaching others requires deeper comprehension.
-
Collaboration: Students build communication and teamwork skills.
-
Multiple perspectives: Different students notice different things, enriching everyone’s understanding.
-
Confidence boost: Explaining complex material helps students feel more ownership over what they know.
Bonus: Presentations can be recorded or shared digitally using VOKA’s screen capture tools. Great for review or peer feedback!
Peer teaching helps students remember facts AND helps them connect the dots, practice real-world communication, and build a sense of community in the classroom.
6. Interactive assessments: learning by doing
Interactive assessments shift the focus from memorization to active engagement, turning evaluations into meaningful learning experiences.
With VOKA, students don’t just answer questions. They explore, manipulate, and apply their knowledge in real time using 3D models, making assessments more reflective of real-world understanding.
Assessment ideas using VOKA
Here are a few ways to make evaluations more immersive:
1. Spot-the-structure. Hide a part of a model (e.g., a valve in the heart) and ask students to:
-
Identify the hidden component
-
Describe its function and role in the body
2. Pathology comparison. Show a diseased organ next to a healthy one and ask:
-
What’s the diagnosis?
-
What anatomical changes are visible?
-
How would these affect the function?
3. Scenario-based reasoning. Present a symptom or condition and ask students to:
-
Explore relevant systems in VOKA
-
Propose a likely cause
-
Support their reasoning using the models
Why it’s effective
-
Encourages critical thinking: Students apply what they’ve learned in a clinical or diagnostic context.
-
Improves retention: Active participation helps students remember more than passive recall ever could.
-
Provides clearer insight: You can directly observe how students interact with models and where they might need support.
-
Engages diverse learners: Visual and kinesthetic learners especially benefit from this hands-on evaluation format.
Instead of asking, “What do you remember?”, VOKA-powered assessments ask: “What can you do with what you know?”
This not only makes assessments more engaging but also prepares students for real-world clinical problem-solving.
Extra tips to use VOKA for teaching
In addition to the main teaching strategies, VOKA offers several features that can streamline your lesson preparation and make the in-class experience more compelling:
Build stunning presentations
Creating great anatomy presentations can be a pain, especially when it comes to sourcing high-quality, accurate visuals. VOKA makes it simple.
Here’s how:
-
Custom views: Navigate, zoom, rotate, and isolate any structure to create the exact perspective you want.
-
Built-in screenshot tool: Capture crisp, detailed images directly from your session — no third-party tools needed.
-
Slide-ready assets: Export your screenshots and drop them straight into your presentation slides, fast and fuss-free.
Bonus tip: Use these custom visuals to break down complex systems into step-by-step sequences. Perfect for layering information in digestible chunks.
Why it matters
-
Saves hours searching for usable images
-
Improves clarity with visuals tailored to your lesson
-
Keeps presentations visually consistent and medically accurate
-
Helps students stay focused and better retain information
Whether you're teaching cranial nerves or kidney function, VOKA gives you the power to create visuals that truly enhance understanding.
Simplify prep with expert-written medical articles
Lesson planning often means juggling multiple sources — academic journals, textbooks, online articles — just to find something accurate and relevant. VOKA makes that process easier with VOKA Wiki, your built-in medical knowledge base.
What is VOKA Wiki?
A curated library of expert-authored articles focused on anatomy and pathology, designed to support both classroom prep and student learning.
How you can use it
-
Plan smarter: Quickly find reliable content for lesson prep without sifting through endless search results.
-
Enrich presentations: Pull in clinically relevant info to enhance your anatomy visuals and 3D models.
-
Assign readings: Provide students with high-quality material that matches what they’re exploring in class.
Why it works
Each article is designed to pair seamlessly with VOKA’s 3D models — combining clear visuals with structured, evidence-based explanations. That means students get both the how and the why, all in one place.
Pro tip: Link to a VOKA Wiki article in your next assignment or lecture slide for quick student access.
Highlighting key details with the 3D pen
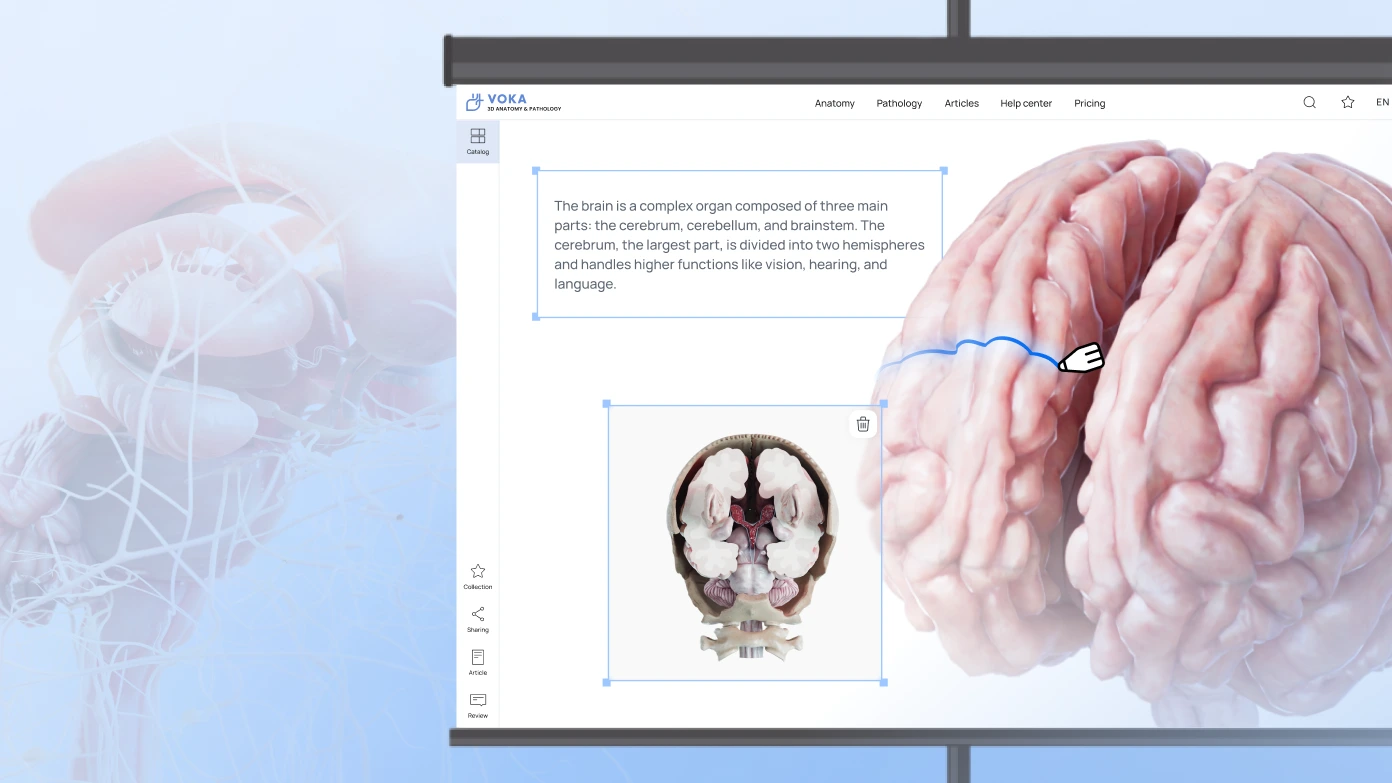
Want to guide students’ attention during live demonstrations? VOKA’s 3D Pen makes it easy to annotate directly on models, even as you rotate or zoom.
Why you’ll use it
-
Draw in real time: Highlight specific structures — from muscle groups to organ boundaries — directly on the 3D surface.
-
Stay dynamic: Unlike static images, your sketches move with the model, maintaining context and visibility.
-
Support deeper focus: Use visual cues to help students follow your explanations and grasp complex spatial relationships.
When to use the 3D pen
-
Tracing anatomical pathways — like a blood vessel through the heart
-
Marking key landmarks — e.g., Broca’s area or spinal segments
-
Demonstrating relationships — such as muscle insertions or nerve connection
The result is a more interactive lecture experience that keeps students engaged and visually aligned with what you’re teaching.
Wrapping up
Incorporating VOKA 3D Anatomy & Pathology into your teaching strategies can truly transform how you teach anatomy and physiology to your students. From interactive assessments and peer teaching to using expert articles for preparation, VOKA offers a range of tools that enhance both the teaching and learning experience. Whether you're dissecting a digital model, using augmented reality for hands-on practice, or drawing with a 3D pen, VOKA helps you engage students in a more dynamic and effective way.
FAQ
1. Which anatomy teaching supplies do I need?
To teach anatomy effectively, you typically need a combination of anatomical models, diagrams, textbooks, and digital tools. Traditional supplies are useful, but digital resources such as VOKA 3D Anatomy & Pathology offer an interactive and up-to-date way to explore anatomy in detail. With VOKA, you can access detailed 3D models, articles, and interactive features, reducing the need for multiple physical resources.
2. Are digital models as effective as cadaver dissections for teaching anatomy?
While cadaver dissections are invaluable for hands-on learning, digital atlases like VOKA 3D Anatomy & Pathology can complement dissections by providing an interactive and flexible learning experience. Digital models allow students to explore anatomy from any angle, zoom in on specific structures, and view different layers of the body, which is difficult to achieve with cadavers. While they’re not a complete replacement, they're a powerful tool for reinforcing lessons and providing a broader view of the human body.
3. How can I use 3D printing in teaching anatomy?
3D printing can be used to create physical models of anatomical structures for students to study. These printed models can help reinforce lessons by providing tactile learning. By printing key body parts or systems, students can gain a better understanding of the spatial relationships between structures. You can also print customized parts based on what’s being taught in your lessons.
4. How can I incorporate VOKA 3D Anatomy & Pathology into my lessons?
You can incorporate VOKA by using its interactive 3D models to visually explain the human body. Start by having students explore the models before class, then dive deeper into the complexities during your lesson with guided discussions. Use VOKA’s features like isolating systems, adding text and annotations, or showing pathology alongside healthy anatomy to create engaging activities.
5. Can I use VOKA 3D Anatomy & Pathology for remote learning?
Yes, the app is an excellent tool for remote learning. Its web and mobile versions make it easy for students to access interactive 3D medical visualizations from anywhere. You can assign independent exploration tasks, guide discussions during virtual classes, and share articles for self-study. The flexibility of remote access makes VOKA a powerful resource for online education.
6. Can I use VOKA for anatomy and physiology activities for high school?
VOKA 3D Anatomy & Pathology can be used to teach anatomy and physiology in college. The app is designed to provide an immersive learning experience, helping students of all levels grasp anatomy in a way traditional methods can't. However, it’s not suitable for teaching anatomy to kids, as the realistic visualizations may be too advanced for them.
Share
Table of contents
Thank you for your comment!
Your comment has been submitted for moderation and will be published soon. We'll email you once it’s live.